Replacement of the Thermistor & the Thermal Switich
of a laserwriter 8500 ( regarding a fuser temperature malfunction)
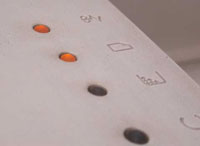 |
If the printer does not print any more, if the two orange lights on the top left pannel are lit, if the test page fails to print, and you get a computer message claiming that there is an error with the fuser, then the fuser must be repaired or replaced. |
|
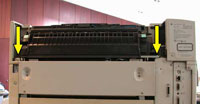
Remove the fuser which is secured by 4 screws. The use of a magnetized screwdriver is recommended. Why? Some of us technicians tend to drop a screw or two. In this case they can fall to the bottom of the printer. The mag. screwdriver can keep the screws from having to be recovered from the bottom of the printer. |
 |
|
The yellow arrows point the two first, the two others being in alignment behind them.
|
|
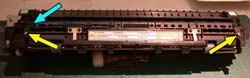 |
Once the fuser is removed from the machine, it is necessary to remove the end caps held in place by two screws (yellow arrows). NOTE: Do not damage the blue cable imbedded in the front pannel of the fuser. (blue arrow). |
|
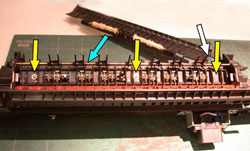
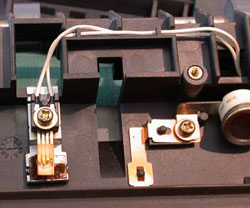
Remove the top pannel and carefully remove the metal bar (blue arrow), while paying attention to the cable (white arrow). Remove the 3 screws (yellow arrows) which holds the bar with the separating fingers. |
 |
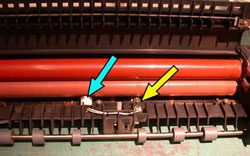 |
The thermal switch is exposed. (blue arrow). The thermistor is exposed (yellow arrow). |
|
The thermistor is on the left. One sees them like this only if the rollers are removed, which is not necessary unless the rollers need to be cleaned and/or replaced. (Recommended in most cases.) |
 |